IBackup Tray
On installation, IBackup creates an IBackup Tray icon  on your system tray.
On right-clicking , a menu appears as below:
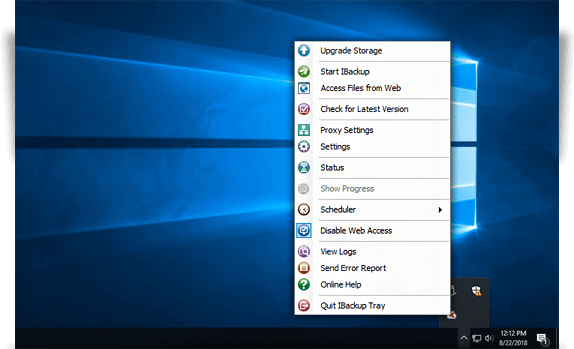
Menu Options
1. Upgrade Storage: Upgrade your account storage plan.
2. Start IBackup: Start the IBackup desktop application.
3. Access files from Web: Login to your IBackup web account.
4. Check for Latest Version: Get updates on the latest version of IBackup application.
5. Proxy Settings: Configure the proxy settings to use the IBackup application.
6. Settings: Manage your application settings like CDP, open file backup, mapped derives and other options.
7. Status: Get the latest status of all schedule backup operations.
8. Show progress: You can view the progress of the scheduled backup job.
9. Scheduler: Manage your backup operations from the IBackup Tray:
a. Manage all the scheduled jobs: Manage your scheduled backup jobs and view the scheduled backup job details.
b. Pause the scheduled backup: Pause your scheduled backup.
c. Stop the scheduled backup: Stop your scheduled backup.
d. Disable all the scheduled jobs: Disable/enable all scheduled backup jobs.
10. Continuous Data Protection: Enable this option for IBackup to detect changes and conduct a real-time backup of files/folders selected for backup.
11. Enable / Disable Web Access: You can enable or disable the web access for any of your connected computers.
12. View Logs: Check the activity log reports of your operations.
13. Send Error Report: Contact IBackup support team for queries, suggestions or feedback.
14. Online Help: Get all the information about the IBackup application.
15. Quit IBackup Tray: Close the IBackup Tray.